

Running your first price test should feel simple.
If the setup takes too long or the workflow feels unclear, most teams never get past the first experiment.
PricisionApp is designed to remove that friction. You connect the price block, verify the setup, launch an experiment, and start learning from live traffic.
You can go from install to your first pricing experiment in under 10 minutes.
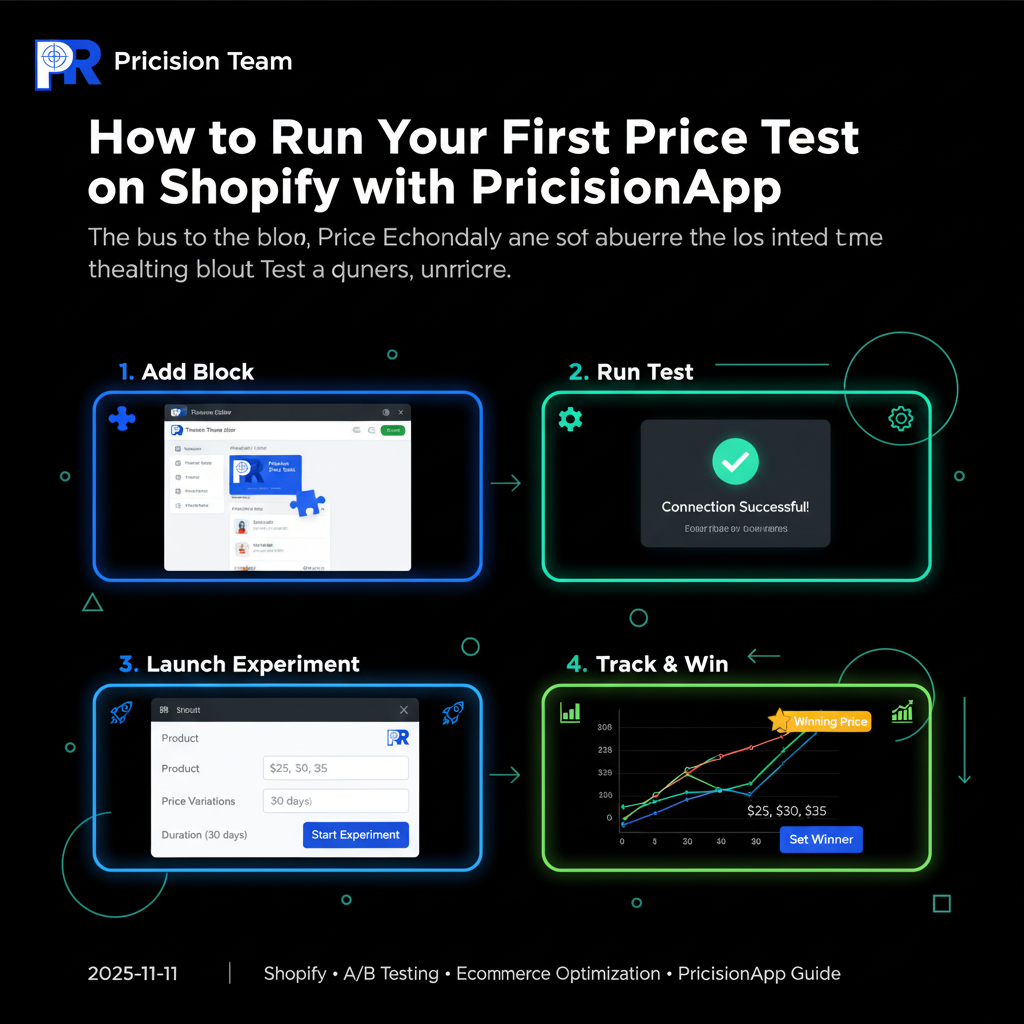
Step 1: Add the Pricision Price Block
The first step is to connect your Shopify product page to PricisionApp’s testing engine.
Start from your Shopify theme editor and open the product page template for the item you want to test.
Then:
- Find the existing Shopify price block.
- Replace it with the Pricision Price Block.
- Save the theme changes.
Once that block is in place, your product page is ready to receive live pricing variations.
What you should see
- The product page still looks familiar
- The price area is now controlled by PricisionApp
- You can move on to validation without changing the rest of the page
Step 2: Run the block test
Before launching a live experiment, verify that the integration is working correctly.
Open your PricisionApp dashboard and click Check Status.
The app will confirm whether the price block is connected and whether the page is ready for testing.
If everything is set up correctly, you should see a green success message.
This step matters because it catches setup issues before traffic enters the experiment.
Step 3: Launch your first experiment
Now you can create your first pricing test.
In the Experiments section:
- Click Create New Experiment.
- Select the product you want to test.
- Add price variations such as $25, $30, and $35.
- Optionally enter your COGS.
- Choose a test duration: 7, 14, or 30 days.
- Click Start Experiment.
At that point, PricisionApp begins rotating prices automatically and collecting performance data.
Step 4: Track results on the dashboard
After the experiment starts, monitor it from the dashboard.
You should track:
- Views
- Conversion rate
- Average order value
- Profit
- Profit per visitor
When a price starts outperforming the others, PricisionApp will surface it as the winning option.
Use that signal to decide whether to keep testing or promote the winner to your live store.
A practical first-test checklist
Before you launch, make sure you have:
- One product selected
- One clear success metric
- At least 2–3 price points
- A test window long enough for real data
- A margin ceiling you will not cross
That keeps the test focused and easy to evaluate.
Common mistakes to avoid
The first test usually fails when stores:
- Change too many page elements at once
- Start without checking setup status
- Run too few price variations
- Stop the test too early
- Judge performance only by revenue
A good first test should teach you something clear about customer willingness to pay.
Final takeaway
PricisionApp makes data-driven pricing much easier to start.
If you follow the four steps above, you can move from installation to a live pricing experiment quickly and confidently.
The goal is not just to launch a test.
The goal is to start finding the price that actually performs best for your store.
Pricision
Stop guessing your next price
Use real customer behavior to discover the price that generates the strongest result for your Shopify store.
Start your free trial